Configuring the SNOM M900 Base & Snom (M80) handsets #
Whilst our team build the Flo:One system for you, adding handsets and configuration where required, we have documented below for reference, a step-by-step guide for the set-up and administration of the SNOM M900, a multicell DECT Solution, and in this example, a SNOM M80 handset which works great with Flo:One!
Step One: Setting up the base, logging in and updating the initial configuration #
Unpacking and logging in #

Remove the M900 from it’s box, and remove the back plate. Do this by sliding the back plate up and it’ll come away from the unit. Plug an Ethenet cable into the device and plug the other end of the ethernet cable into an online PoE Switch.

Located the IP address of the device, this could be from either through scanning the network or looking in the DHCP table of the router. Alternatively, on any SNOM handset, press “Menu” then dial *47* This will list all the IP addresses of the bases in it’s range.
When you have the IP address, enter it into a browser and a “Sign In” pop up will appear.
For the first time logging in, the default username and password are:
Username: admin
Username: admin

Once signed in you’ll see the main Welcome screen.

Naming the base #
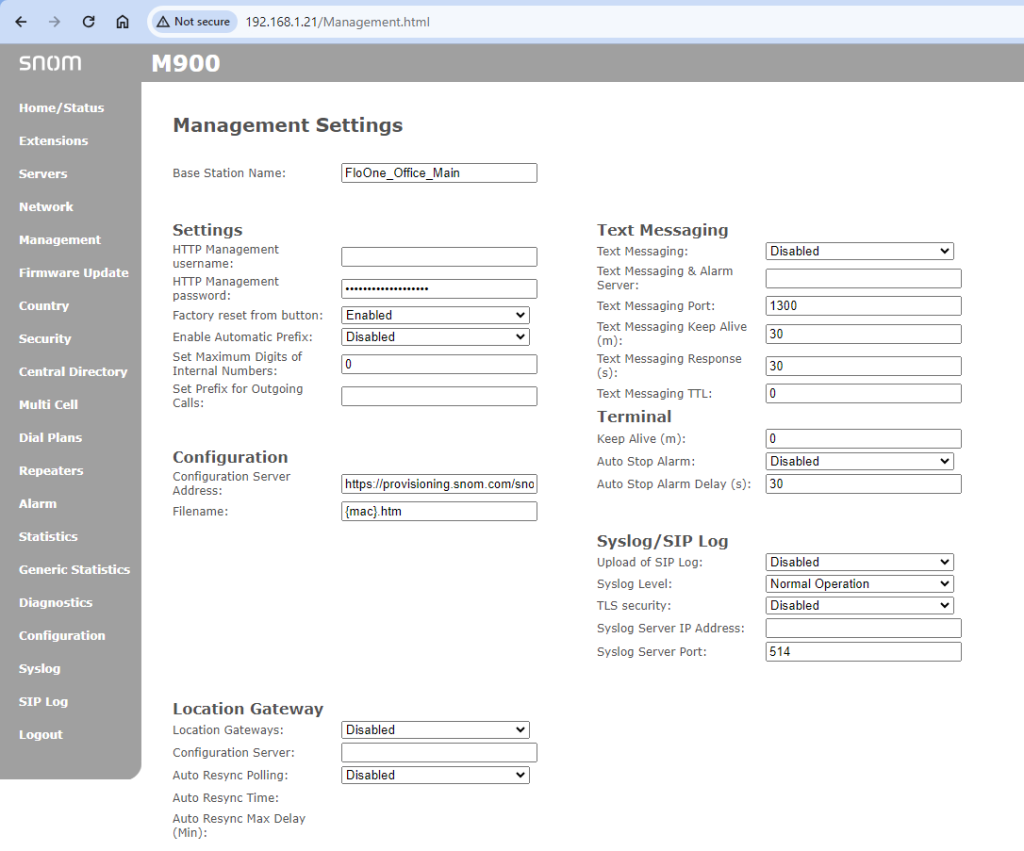
Click on “Management”
Give the Base Station a name such as: “FloOne_Office_Main” for the main unit, and if it’s going to be a repeater, “FloOne_Office_Repeater_Unit_2”.
Click “Save“
For a repeater – now jump to “Step 4: Setting up Multi-Cell Systems”
(The repeater username/password etc will be configured as per the main base unit)
Updating the username and Password #
For security, the you must update the default settings.
– Click on “Security”
Then enter the following details:
Username: FlexiNet
Current Password: admin
New Password: (ENTER NEW PASSWORD!)
Confirm Password: (ENTER NEW PASSWORD!)
IMPORTANT NOTE! BOTH the username and password are case-sensitive!
It will log you out at this point, log back in using “FlexiNet” as the username and the password you have set above.

Updating the time zones #
Next click on “Country”
Enter the following details:
Select country: Unitied Kingdom
Select Language: English
Time Server: time.google.com or pool.ntp.org
Click Save

Step Two: Adding the Flo:One server #
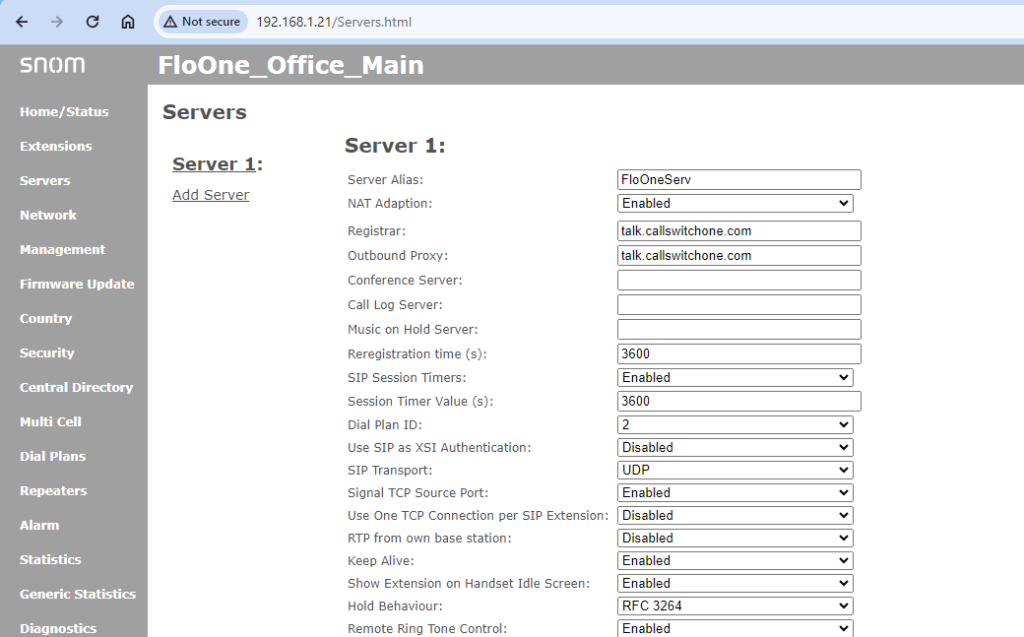
Click on Servers > Add Server
Add the Domain: from the Flo:One portal (talk.voipcp.com or talk.callswitchone.com) into Registrar and Primary Proxy.
Change the Codec to “G722” as the primary (Move to top) then Click “Save”

Step Three: Adding the extensions & handsets #
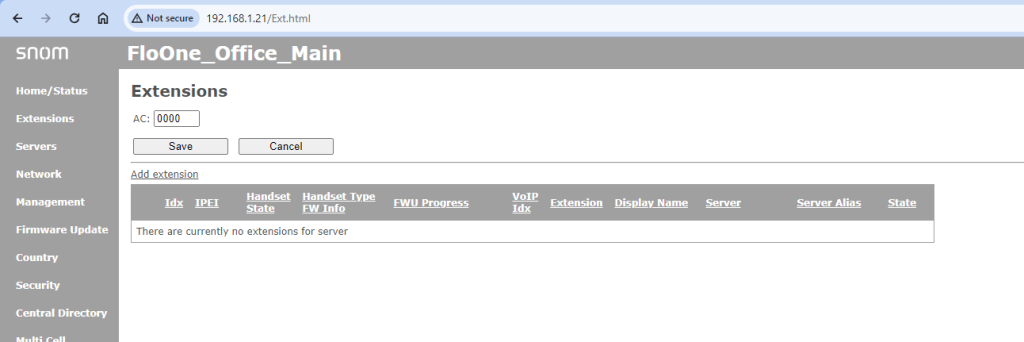
Click on “Extensions” then click “Add Extension”.
| Line name: | (Name – i.e. Walkabo) |
| Handset | “New Handset” |
| Push-To-Talk | Disabled |
| Extension | |
| Authentication User Name | |
| Authentication Password | |
| Display Name | Name for the handset (I.e. Warehouse) |
| XSI Username | – |
| XSI Password | – |
| Mailbox Name | Main |
| Mailbox Number | 8000 |
| Alarm Number | – |
| Paired Terminal | No Paired Terminal |
| Server | Server 1 (From when we provisioned the server) |
| Call waiting feature | Enabled |
| BroadWorks Feature Event Package | Disabled |
| UaCSTA | Disabled |
| Forwarding Unconditional Number | Disabled |
| Forwarding No Answer Number | Disabled |
| Forwarding on Busy Number | Disabled |

Check the userbox then click “Register handset(s)”

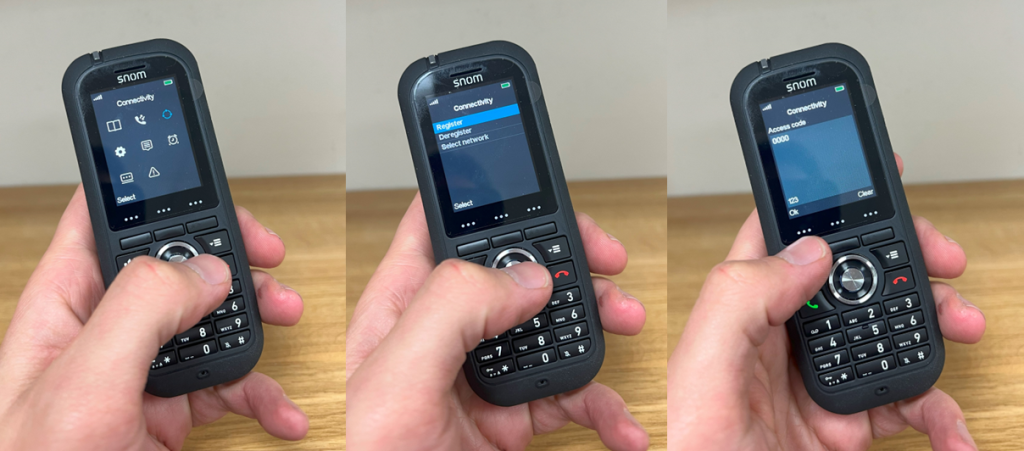
Next power up a phone you wish to register by pressing and holding the power button (Hangup button) When powered up, press;
The 3 lines button >
connectivity >
Register >
Select first “Empty” line >
Enter – 0000 (This is the Access code, shown as “AC:” at the top of the “extensions options” in the Extension section)
Step 4: Setting up Multi-Cell Systems #
On the main Admin Base, click on “Multi Cell Settings” then change “Multi Cell System” to “Enabled”.
Click “Save and Reboot”. You should see “Unchained Allowed to Join as Primary” at the top of the “Multi Cell Settings” screen.

To set up repeaters, login and update the device name using the guide back at Step One.
After, Click on “Multi Cell Settings” then change “Multi Cell System” to “Enabled” then click “Save and reboot”.

The system will then pair the units up. Please note this will take a few minutes, and you will be able to log in between using the admin/admin login details. but it’ll reboot and should share the login details from the primary unit previously set up. If username: admin password: admin still works, it’s not done yet! It’ll need to reboot again!

You’ll be able to see the devices under the Main unit’s Multi Cell Settings Tab.

These units are now configured and you’re ready to use the system!
Configuring Alarm button #
The M70, M80 and M90 have a push alarm button.
The M85 has 5 separate alarms, Man Down (Handset moves from vertical to horizontal so protects against falling over) No movement (Phone stops moving) Running Man (Handset is moving very fast), Pull cord (Phone has a small strap, and if it’s pulled it’ll pull out of the phone and set off alarm) and Push alarm button.
Within the alarm section, you can pick the alarm profiles and pick from;
- Call” (Standard call, extension/hunt group etc)
- Message – Message from one SNOM handset to another SNOM Handset or specialiflo-osed 3rd party messaging system
- Beacon Message – This sents a SNOM beacon message to the Beacon hardware.
Trigger delay – How long until triggering (I.e. man down)
Howling – Sets an emergency ringtone from the handset so people can find the phone and user who set off the alarm.
Then set the extension and pick the aparm profile to assign to the handset.
Entering Survey mode #
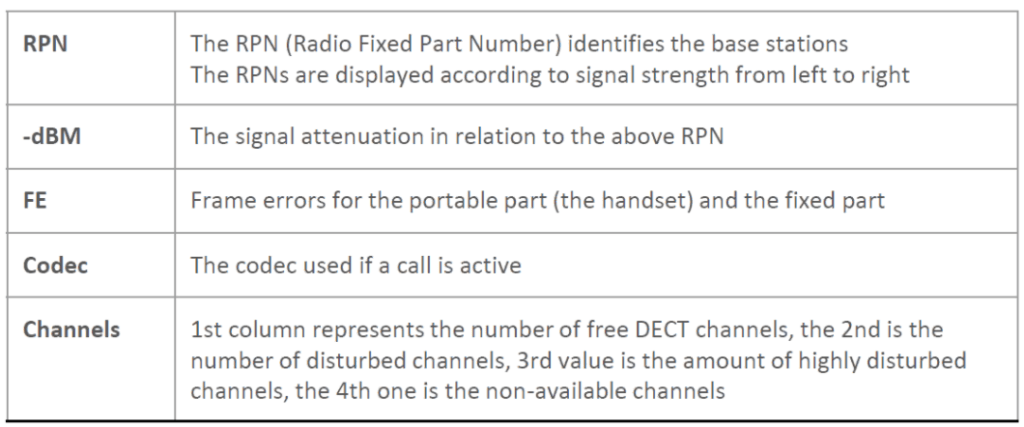
The handset can also perform survey tests – To enter “survey mode”, enter the menu and dial *789872*
